Questions? Feedback? powered by Olark live chat software
caramel & cocoa

Caramel & Cocoa - cooking, parenting, fashion, diy, eating, living, a blog

Wednesday, December 14, 2011

Why this blog?


Someone recently asked me a simple question.

"Gabi why do you spend so much time on your blog? There must be days when no one visits your page."

And the reason streamed from my mouth as if I had rehearsed it before. But I never had. I don't even think I'd ever really vocalized it.

Yes. This blog is about cooking & baking, children & weight loss. But there is more to it than that - it is a life blog documenting the journey I started years ago and that will take me ... who knows where, in the next ten years. Ten years ago, I was 20 and my expectations of life were very different than that which is my reality now.  Life is harder than I had thought and I realize I was a tad too idealistic in my youth.

I see this blog as an opportunity to document my life and what I am doing so that 10, 20, 30 years from now, my girls can see what their mom was up to, having sacrificed a bit of a career to stay home and "just be a mom."

Tuesday, December 13, 2011

Vickii's Brownie


I was skeptical about this brownie recipe when I first read it - only because I've tried about 20 brownie recipes in the last 4 months and have always been disappointed. This brownie is luxurious and perfect. It tastes  & looks like a high end brownie you would find at a posh shop on the high street. You get a very flaky top and a moist middle. Thumbs up to Vickii who concocted this recipe over a period of years. Make and give as a gift & you will have friends for life!

For the recipe - click here Vickii's Brownies. Though below are the ingredients measured in both grams & ounces for your convenience. Dont forget to grease & flour the tray because brownies will stick to the baking tin. Also, when you stir in the eggs to the butter/chocolate mixture, stir it alot, well and quickly which will ensure a flaky top. You get a crispy top on brownies because you are creating a "natural meringue" which is nothing more than whipped egg whites & sugars. That is why most brownie recipes require you to cream or melt butter & sugars and THEN add the eggs. Basically, the more you beat the mixture AFTER adding the eggs, the crunchier/crispier the top will be. yum yum.


300 grams/10.5oz dark chocolate (At least 70% cocoa solids)
250g/9oz unsalted butter
100g/3.5oz milk chocolate cut into large chunks
100g/3.5oz white chocolate, cut into large chunks
175g/6.2oz plain flour
1tsp baking powder
4 large eggs, lightly beaten
2 tsps vanilla extract
200g/7oz dark brown sugar
125g4.4oz caster sugar (or superfine sugar in US)
1 tablespoon instant coffee granules

Peanut-Butter Cheesecake


This is my version of Nigella's peanut butter cheesecake and it is phenomenal. You have to try it - It is sure to impress your guests. 

Ingredients:
Base:
200 grams/7oz of digestive biscuits (if you can't get any use graham crackers)
85g/3oz ounces unsalted butter (softened)
Filling:
500g/1lb of cream cheese
3 eggs
3 egg yolks
200 g/7oz caster sugar (or superfine sugar in US)
125ml/4.24 fl oz of sour cream
250 g/9oz of smooth peanut butter
Topping:
250 ml/9fl oz sour cream
100g/3.5 oz milk chocolate chips
30g/1.25 oz soft brown sugar

How to:

  1.  Preheat the oven to 170C/325F/Gas 3 (remember if using a fan lower heat about 20 C)
  2. Make the base: process the biscuits (or crushed graham crackers) and butter in a food processor. Once the mixture comes together in a clump, turn it out into a 23cm/9in springform tin and press it into the bottom of the tin and up the sides, using your fingers.  Place in the fridge for at least 10 minutes or until your filling is ready. I do not own a food processor so I crushed the biscuits in a bag first and then slowly kneaded the butter in using my fingers. I also HIGHLY RECOMMEND buying a springform tin as opposed to using a traditional 9 inch tin. Here is a description of what a springform is - http://whatscookingamerica.net/Q-A/SpringForm.htm. I actually had no clue until I started baking about a year ago.
  3. For the filling, combine the cream cheese, eggs, egg yolks, sugar, sour cream and peanut butter in a food processor until smooth. I used a blender & it came out fine.
  4. Pour and scrape the filling mixture into the cheesecake base in the chilled springform tin and cook for 1 hour, checking after 50 minutes. The top – only – should feel set and dry. When cooked, remove from the oven.
  5. Make the topping:  warm the sour cream and chocolate chips with the brown sugar gently in a small saucepan over a low heat until melted & combined.
  6. Spread the topping very gently over the top of the cheesecake (IN THE SPRINGFORM TIN). Put it back in the oven for 10 minutes.
  7. Once out of the oven, let the cheesecake cool completely in its tin, then cover and put into the fridge overnight.
  8. Remove the cheesecake from the fridge about 15 minutes before serving so that it is easier to spring from the tin. It gets mushy - so keep it cool. 


Wednesday, December 7, 2011

Waste not Want not Wednesday - Love - o - Leeks


I was really agitated this morning when I opened the fridge and saw 5 whole leeks in there. Even better, my veg box arrives tomorrow and I am expecting - you guessed it - MORE LEEKS. 

For lunch, I washed then cut up the leeks and sauteed in some butter after seasoning with salt & pepper. It turned out lovely. And I am looking forward to having a bit more with dinner. All that is left in the fridge is a tomato. 

A Day in with the kids


If I am being 100% honest, this post is sort of a self-validation & justification. Why? Today I did something I never really do. I kept the girls indoors! I don't like to do that because I think it is important for the girls to get out, get some fresh air and socialize with others. 

Originally we had a play date scheduled for the morning but that was cancelled due to a cough & the sniffles. Now. It is very cold outside but dry and I am not naturally an outdoorsy person in that I really dislike being cold or getting dirty & wet. In my defense, I do force myself to take the girls to the park, on walks, or to the library - rain or snow - every day, except today of course. In comes the guilt. 

That being said, I have not let them watch ANY tv because I kind of feel that watching too much tv can be a source of depression when you get older and I don't want them to develop bad habits. I remember being very young and wanting to go out and do things like play sports or see friends but my parents were so strict I stayed indoors all of the time - watching tv. 

In summary I did not let them out and I did not let them watch tv. 

What did we do? In the morning we made some cookie batter for chocolate sugar cookies and all got very dirty and messy. We then made the cookies & ate some of them. After that we all spent an hour drawing and practicing our colors on a massive piece of cardboard paper. Finally, the girls helped me make lunch and we went upstairs for a book and nap at 1pm. It is now nearly 3pm and the girls will be up soon. It gets dark by 4 and it is cold and windy so I am not sure if we will get out for more than a walk around the block. 


Tuesday, December 6, 2011

Gingerglazed Ham

This recipe takes minutes to prepare and is no work at all but the result is good enough for a Christmas dinner. I cannot take the credit here. The recipe comes from my all time favorite "DG" Nigella Lawson. I suggest you read my summary and then click the link at the bottom of the post to watch a 3 minute youtube video on how it is done. 

Ingredients:
Ham (I prefer smoked)
lots of dry gingerale (2-7 liters depending on size of ham)
Hot English Mustard (like Grey Poupon in USA) 2 tablespoons
Ginger Preserves (250g or 9 ounces), if you cant find any use orange marmalade & add a teaspoon of dry ground ginger
dark brown sugar (100 grams or 3.5 ounces)
teaspoon of cloves

1. First, rinse off the ham and place in a large pot. Pour the gingerale into the pot until the ham is fully covered and bring to a boil. Once bubbling reduce heat slightly and cover. It needs to bubble for 20 minutes per 500grams (20 minutes per pound).
2. When ham is nearly done boiling, heat oven to 220C (390 F) (remember some ovens, like mine are very hot so you might need to lower the temperature by 10 - 20 degrees). GET TO KNOW YOUR OVEN. ;)  
3. In a bowl combine mustard, preserves, brown sugar and cloves. Mix well. 
4. When ham is done place on foil lined oven tray and remove most of the fat. Pour the glaze over the ham and pop in the oven for 20 minutes. This is delicious cold or hot. 

FOIL LINED TRAY IS ESSENTIAL because the glaze will stick to your tray. 


Nigella Lawson Ginger Glazed Ham 

Monday, December 5, 2011

Chocolate Chip Cookie (large & crispy)

This chocolate chip cookie is INSANELY sweet but has a lovely crispyness to it. I am having major sugar cravings since I am trying to watch what I eat. So I decided to toss an insane amount of sugar and chocolate into a cookie. If you don't like EXTREME SWEETNESS then I suggest you reduce both of the sugar amounts by about 50g (or 1.5 ounces) each and add less chocolate chips.


Ingredients:

250 grams (9 ounces) all purpose flour
1/2 teaspoon of baking soda
1/2 teaspoon of salt
170 grams (6 ounces) butter (very soft)
200 grams (6 ounces) light brown sugar - reduce by 50g or 1.5 ounces if you don't want them too sweet
100 grams (3.5 ounces) caster sugar (also called superfine sugar in US) - reduce by 50g or 1.5 ounces if you don't want them too sweet
1 tablespoon vanilla extract
1 egg
1 egg yolk
290 grams (10 ounces) of chocolate chips

1. Preheat oven to 170 C (349 F).

2. Sift flour, baking soda and salt and set aside.

3. Whisk or beat together butter, brown sugar & caster (superfine) sugar until creamy. Beat in vanilla, egg, egg yolk. Slowly mix in the sifted ingredients until well combined. Add chocolate chips and mix with a wooden spoon. Drop cookies onto parchement paper or greased baking trays. Each cookie should be about 4 tablespoons (THIS IS A LARGE COOKIE). Place them 8cm (3 inches apart). I made smaller cookies (only 1 round tablespoon) for the kids because there is no way they can eat that much sugar without getting sick. The smaller cookies take about minutes less cooking time.

4. Bake for 14 - 16 minutes, until the edges begin to toast. Cool on baking trays for 2 minutes then move off of baking trays to cool completely.

5. Enjoy.


Thursday, December 1, 2011

Letting kids grow

Ok - In summary I had a strong disagreement with a friend called "Jane". Her name is not really Jane but for purposes of this piece, I will call her Jane.

This does not happen often, actually it never happens because I am a very passive person. I would rather silently know and accept I am right than "get in your face" about something. I do not like to start controversy and amongst groups of people I am definitely not one of the most outspoken.

Well, I am not exactly sure how the conversation came about, but in summary, the conversation turned to two main points. First, why did I potty train A before her second birthday and second, why on earth did C only drink from a cup starting month 10.

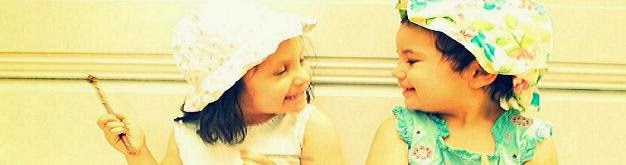
For those of you reading who have kids, yes, in Jane's opinion A and C were far too young to have been pressured into any of those. In response, and a bit annoyed, I simply explained to her how clever my girls are. And then I proceeded to explain that it was easy. A had seen a close friend a couple months older use the potty and since then she wanted to try and use it. C, was breastfed until recently and so as a result, did not miss the traditional "bottle" when I tossed it at month 10. Jane's opinion, and this is a quote, was that it was a bit "inconsiderate" to have had my kids so closely together and that the potty training and bottle weaning pressures would manifest in some other way later on in life. I started laughing hysterically but managed to utter the word "bologna" followed by "you should see A eat with a knife and fork." I have not heard from her in 5 days.

Ok. In retrospect. I ADMIT, I handled the situation poorly. Having had the time to sit down and respond this is what I have to say. My job is to educate and teach my children skills that will help them in the "real" world. These skills are essential for them in life and will make them feel independent and a sense of accomplishment. I see every day as an opportunity to teach something new to both of them and if I were not to do that, I'd feel as if I were letting them down. It is a tough world and they need to be prepared to compete.

To you and I, drinking from a cup and using the toilet are easy tasks but to toddlers, they are big things to do. I am so proud of A for being potty-trained and yes, selfishly, it makes my life a whole lot easier. C at 10 months was capable of drinking from a cup. A bottle, like the breast, serves a purpose, to provide nutrition to those who are unable to drink from a cup. I will admit it was not easy for "me", not C, to stop breastfeeding. I loved the bond, the connection, but at the same time realized that I need to let my baby grow.

We all make decisions for our kids and all we can do is hope they are the right ones.

Monday, November 28, 2011

El Camion Mexicano (Soho London) - Restaurant Review


El Camion Mexicano (Soho) - 25-27 Brewer Street
Cuisine: Mexican Food


I consider myself a bit of an expert when it comes to Mexican food so I thought that I would start my restaurant reviews with what I know best. 

Summary: The food was tasty and verging on authentic but overpriced for the portions. The atmosphere was loud, colorful and the decor reflected a stereotypical characterization of Mexico which is both good and bad (ie tequila, Virgin Mary, Che). I was there (on my own) on a Friday night and the place was very busy, in slang terms, "kickin". The staff and service were inadequate - but that might just be my snobby American attitude towards service.  Read on mis amigos

The Food: Like I said, Mexican food is my domain and well, I ordered the the tacos "de picadillo" which is a ground beef based but very well seasoned taco. I actually really enjoyed the actual tacos and they tasted "authentic" enough but the portion was so small I then ordered another set of tacos but this time shredded pork ones and I will admit they were tasty as well. Two sets of tacos and a diet coke cost me £17.10. Far too expensive, albeit good.  

The Atmosphere: If you think of all of the images that pop into your head when you think "Mexico", that is exactly what this restaurant looks like. The walls are loud vibrant colors, any open space or surface is covered with assorted tequila bottles and salsa containers. And of course, the token statue of Our Lady makes an appearance as does a portrait of "Che", who by the way, was Argentinian but lived and died in Mexico. I was there on a Friday night and the restaurant was very busy, as was the street where the restaurant was located. Couple after couple left after hearing the length of the wait for a table. In the background, Mexican music was playing, though it was completely muffled by the sounds of people shouting across tables and drunken laughter coming from group tables. It is the type of place you really have to be "in the mood" to stomach. 

The Service: I mentioned earlier that the place was busy. It is always a good sign for a place to be busy. But it is not good for the staff to look rushed, stressed, flustered. Upon entering the host looked at me and I had to initiate contact. I told him I would be eating alone and did not mind eating at the bar. He basically told me to wait for a seat and sit down when I saw one. A bit - rude but I kept an open mind. As soon as I found a free stool I sat and waited for about 10 minutes for the eating area before me to be cleared, a task which I had to request to be done as well. Finally the waiter came who was nice enough but I could tell rushed. I already knew what I wanted so I immediately ordered and away he went. I would never see him again. My food, drink, second order, bill and eating utensils (brought after the food) were all placed before me by different servers. No one so much as smiled and I don't think even made eye contact. In all honesty, the servers all looked like very nice people, so I think the poor service is a result of poor training. I did not leave a tip. 

Would I go back?: No. Unless I was very drunk or starving. While the food was good, the experience left me feeling like I paid a lot of money for a fast food experience. 


Thursday, November 24, 2011

My diet continues! The Force is with me.


So. I have had moments where I am questioning this whole "diet" I am on. Why? because it is a very slow process. In the past, I have gone through insane stages. I went through a period of time where I would run 18 - 25 miles a week & partook in various types of gym classes, and yes I was thin. I have also been known to try fad diets and lose 10 pounds in a week. But the problem is that the weight never stayed off and I kind of just want to get to a comfortable point where I can just maintain maintain maintain without having to be a gym rat or refuse myself foods. My diet is all about balance. BALANCE BALANCE BALANCE. This is about balance. oh & yes it is about the FORCE too. Well, not really, but I came across this photo from the Star Wars Exhibition 2008 Madrid & well, I thought it was relevant. But it's not.

Monday, November 21, 2011

cha cha heels


I recently went to a "Christmas ball" which is really more or less, like an adult prom. I had a great time, but I had a terrible time finding something to wear. It is just that, at the moment, I am not completely comfortable in my own skin and I wanted to be able to move and dance without worrying about any bumpy parts of my body, anything falling out of a dress, something too long or too short and my goodness I wanted to wear comfy shoes. Oh - and above all I did not want to spend a fortune. Above is the look I chose after consulting with Emily from http://cupcakesandcashmere.com/. This is what she told me. 

"As for dresses, I'd suggest something in a fun, jewel color (avoid black) with sleeves (it is winter, after all) and a slightly billowy waist. Wear a statement necklace (preferably something sparkly to draw the eye up), a pair of nude/metallic platform heels and you'll be good to go!"

This is what I went with. I could not find a billowy waisted dress but loved the long sleeves and loose waist. It made me feel comfy. The shoes I have had for years and the clutch really completed the look. Best of all I spent very little. 


1. Dress from Monsoon as seen here. http://www.monsoon.co.uk/tawny-tunic/invt/95311627/#
2. the Clutch bag I got from TK max for a 10.
3.  I bought the statement necklace at an arts and crafts fair for 35 pounds. I am sure I will get alot of use out of it.
4. The shoes I have had for donkey's years. "that means for a long time"

Slow Roast Lemon, Orange and Garlic Chicken with Parsnips.


This was my Sunday experiment and it was an absolute DELIGHT! This will certainly become a regular in this household. Easy to do. You just need a bit of time because it slow cooks in the oven for 2 hours and then cooks at a higher heat for about 45 minutes.

Ingredients:
a whole chicken cut into 10 pieces. Though I used 10 chicken thighs because it is cheaper meat. It is best to keep skin on.
2 lemons cut into eighths
2 oranges cut into eighths
6 garlic cloves peeled
thyme (a small handful)
olive oil
pepper & salt
10 ounces red wine though you can use white wine as well. I used red wine because it was already open.
parsnips or carrots or potatoes or a mix of them.
basil leaves if you have any

1. Heat oven to 300 F (150 C / 140 if you are using a fan).
2. In a large bowl combine 4 tablespoons of olive oil and the garlic cloves. Squeeze in the juice from the lemons and oranges. Keep the lemon and orange pieces and toss those into the bowl as well.  Throw in the leaves from the fresh thyme. If you have any on hand, add a couple basil leaves. Mix loosely with a spoon. Set aside.
3. Place the chicken pieces in a roasting tin/oven dish. Spread the olive oil/lemon/orange mixture over the chicken and mix well with your hands making sure that the chicken is fully coated. Try to face the chicken skin up.
4. Pour the wine (red or white) over the chicken. Add salt and pepper. Cover very tightly with foil and roast in oven at 300 F (150 C/140 C if using a fan) for 2 hours 15 minutes.
5. 15 minutes before the chicken is done slow roasting, bring your vegetables to a boil and boil for 10  minutes.
6. Add the vegetables to the roasting tin with the chicken and try to mix into the juices a bit.
7. Increase the oven heat to 390F (200 C/ 190 C if you are using a fan). Cook for about 45 minutes uncovered. The chicken skin should be a golden color and the oranges and lemons will look burnt at the edges.


Sunday, November 20, 2011

Margarita's Cheesecake


Margarita is my mom. Now. My mom only taught me a handful of dishes and baked goods and this has always been my favorite. But I'll admit I had to ring my sister and ask for the recipe since I always forget it. It is easy and so so yummy. Pie crust is easy to make too. My only tip is to make sure the dough is cold when rolling it out (ie use cold butter & ice water) and put in fridge if you are not rolling it out immediately. Working with a warm dough causes it to break while rolling out. Alternatively, you can by the crust ready made.

For Pie Crust:

1 cup flour (220 grams)
2.5 ounces cold unsalted butter (145 grams) best to cut it into pieces
teaspoon of salt
ice water (2 tablespoons)

For the Filling:
about 300 grams cream cheese (about 10 ounces)
3/4 cups white sugar
3 tablespoons light brown sugar (I use muscavado)
1 tablespoon vanilla extract
2 tablespoons lemon juice

To make the pie crust:
In a large bowl add flour and salt and mix. Cut the butter into squares and add to the bowl. Mix contents together using your fingers. Combine until the mixture resembles wet sand. Then use ICE COLD water to bring the mixture together and form the dough into a disk shape. You might not need all of the water.

Sprinkle flour over your counter top and on the rolling pin. Roll out the dough to a large circle shape and place over into the pie tin. Once that is ready put aside.

To make the pie filling:
Heat oven to 350 F (175 C, about 20 degrees less if you are using a fan)
In a large bowl place the cream cheese, white sugar, brown sugar, vanilla extract and lemon juice until smooth. I just use a hand wire whisk. Pour the batter into the pie tin. Bake until the top is a golden color and a fork inserted comes out clean. The time depends on the oven but should be between 30 - 40 minutes.

To serve let it cool. I served mine with a bit of maple syrup. It was very good and if I am honest, I now have a second one in the oven. ;)

Thursday, November 17, 2011

Mince (Ground Beef)


I like to make ground beef (minced meat) every now & again because it can be popped into different types of dishes or served on rice or with vegetables. Great. I made this lot and stuck half of it in the freezer which I will defrost sometime in the future when I don't feel like cooking.

Mince is easy to make, but the hard bit for me is getting my toddler to eat it without picking out the onions or garlic. I have started turning the onions and garlic into a paste and cooking that first, then adding the mince. It takes minutes to do, really improves the mince and the child eats it.

How to:

Take 1 diced onion, 2 garlic cloves, 2 basil leaves (if you have any on hand), a bit of leek, a tablespoon of butter, 3 tablespoons of water and whatever other herbs and spices you like (I used a knorr cube) and pulse it in a food processor to create a paste. I just use a blender because I don't have a food processor. You might need to add more water.

Once the paste is done, pour it onto a large saucepan with olive oil on it & cook it for a few minutes.


Add the seasoned beef and brown. Season.

Add a can of diced tomatoes and let bubble. Once bubbling, reduce the heat and cook on low turning and mixing every now and again. Depending on how much beef you have, it can take anywhere from 20 - 40 minutes to cook thoroughly & you might need some more tomatoes. Be creative & just go with it.

Wednesday, November 16, 2011

Waste not Want not Wednesday : Roasted Eggplant (Aubergine) & Steamed Cabbage


Another Wednesday has arrived which means my organic fruit & vegetable box arrives tomorrow & I need to eat up all of the stuff in the fridge. It's been a hungry week and all I had left in the fridge was 1 eggplant (called aubergine in the UK), half a cabbage and some leeks. Deciding to keep the leeks for the weekend, I had the aubergine and cabbage. It was a vegetarian delight and so good that I really hope the delivery tomorrow has more aubergine (eggplant) in it. Tip - simple meals go well with a full-bodied, spicy red wine. I had a glass of Rioja.

Easy meal:

Set oven to 190 C (380 F). Cut the eggplant (aubergine) lengthwise. Score the cut side into little diamond shapes. Salt. Pepper. & drizzle with olive oil. Oil an oven pan and place eggplant (aubergine) on top, scored side up. Place in oven for about 45 - 50 minutes or until very soft inside. Raw eggplant is not very nice so it is always better to overcook than to under-cook.

For the cabbage, place cabbage in a steamer for about 10 - 15 minutes. Drizzle with olive oil & balsamic vinegar before serving.